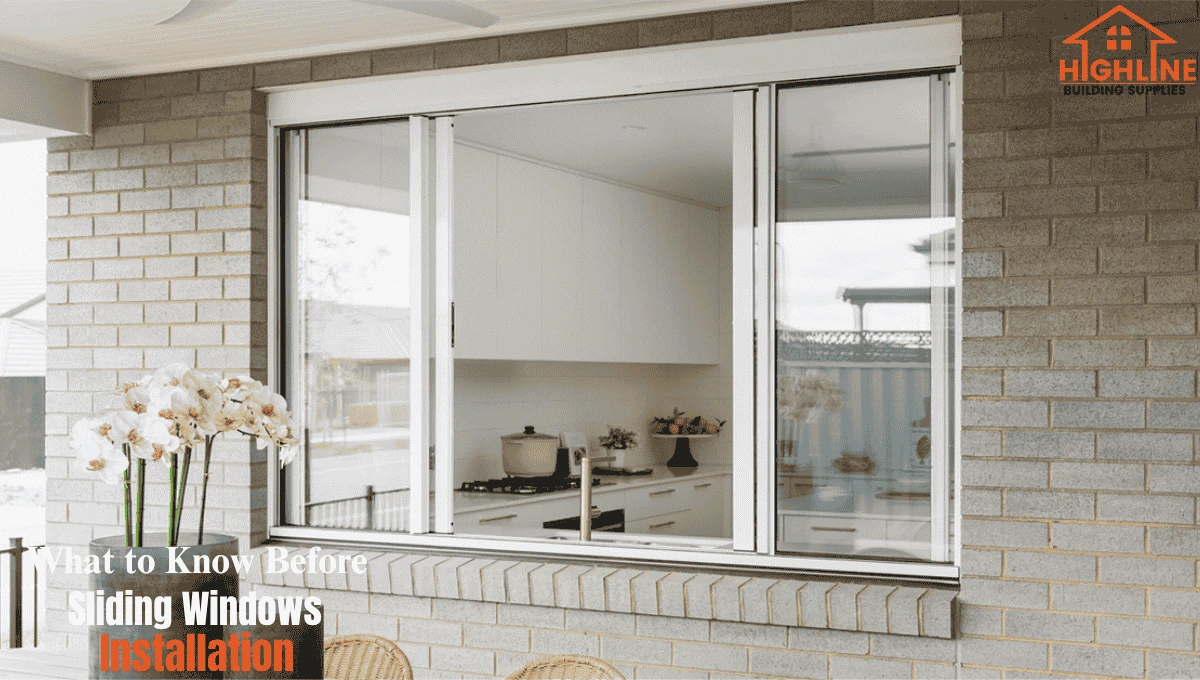
If you’re planning sliding windows installation, it’s worth slowing down before you order anything. Sliding windows can look clean, let in great light, and work especially well in rooms where you want easy ventilation without a window sash swinging outward. But if the sizing, frame type, placement, or installation details are off, the result can be frustrating drafts, sticking tracks, water intrusion, or a window that never feels quite right.
This guide walks through what actually matters before installation: how sliding windows work, where they perform best, what to compare before buying, the most common mistakes people make, and the practical details that help homeowners and builders avoid expensive do-overs.
What Is a Sliding Window?
A sliding window (sometimes called a horizontal slider) opens side to side instead of up and down. One or both sashes move along a horizontal track.
That sounds simple and it is but the design makes sliding windows behave differently than single hung, casement, or awning windows.
How sliding windows work
Most models have:
- A fixed sash on one side
- A movable sash that glides horizontally
- A track system with rollers
- A locking mechanism
- Weatherstripping to help with air and water control
Because they open horizontally, they’re often easier to use over counters, sinks, or in spaces where an outward-opening window would be awkward.
If you’re comparing styles, browsing actual Sliding windows can help you see the difference in proportions, frame profiles, and venting area before you commit.
Why Sliding Windows Are Popular
Sliding windows are often chosen for practical reasons, not just appearance.
Main benefits of sliding windows
- Easy operation
They’re generally simple to open and close, especially for wide openings. - Good ventilation
They can move a lot of air, particularly in kitchens, bedrooms, and living spaces. - Clean, modern look
The horizontal lines work well with both contemporary and transitional homes. - Good for wider openings
In many cases, a slider is more practical than trying to fill a wide opening with another style. - Low exterior clearance needed
Since the sash doesn’t swing out, they work well near walkways, patios, or decks. - Often easier to maintain than crank windows
Fewer moving mechanical parts usually means fewer long-term issues.
The Limitations People Often Overlook
Sliding windows are useful, but they’re not the best fit everywhere.
Common limitations
- Tracks need to stay clean
Dirt and debris can affect smooth operation over time. - They may not seal as tightly as some other styles
A quality unit can still perform very well, but casement windows often win on compression sealing. - Ventilation may be partial
In many designs, only half the opening is operable. - Large units can get heavy
Bigger sashes need better rollers, better hardware, and careful installation. - Water management matters a lot
Poor flashing or slope issues can create problems faster than people expect.
That doesn’t make sliding windows a bad choice. It just means they need to be selected and installed with realistic expectations.
Where Sliding Windows Work Best
Not every room benefits from the same window style. Sliding windows tend to perform best in places where width, accessibility, and airflow matter more than a tall vertical opening.
Best use cases for sliding windows
- Over kitchen sinks
- In bedrooms
- In living rooms with wider wall spans
- In basements (depending on code and egress needs)
- In home additions
- In modern or low-profile architectural designs
- In replacement projects where the original opening is already horizontal
For homeowners, this usually comes down to convenience and layout.
For builders, it often comes down to repeatability, sizing, and design consistency across elevations.
Before You Buy: The Key Things to Check First
This is where most window decisions go right or wrong.
A lot of people focus almost entirely on appearance and dimensions. Those matter, but they’re not the only things that affect long-term performance.
1) Confirm Whether It’s New Construction or Replacement
This changes everything.
New construction installation
Use this when:
- You’re building a new home
- The wall is open
- You’re changing the opening size
- Exterior cladding or sheathing is being reworked
New construction windows typically include a nailing flange or fin and are integrated into the wall system.
Replacement installation
Use this when:
- You’re keeping the existing rough opening
- The wall system stays mostly intact
- You’re swapping out an old unit for a new one
If you’re shopping for sliding window replacement, measuring and frame condition matter even more than style.
A replacement install can go very smoothly—but only if the existing opening is square, dry, and structurally sound.
2) Measure the Right Way
This is one of the most common failure points.
People often measure the visible frame and assume that’s enough. It isn’t.
What should be measured
- Width at top, middle, and bottom
- Height at left, center, and right
- Diagonal measurements to check square
- Jamb depth
- Interior and exterior trim conditions
- Sill slope and condition
Even small framing inconsistencies can affect how well the sash slides and seals.
Practical rule:
If the opening is older or visibly out of square, don’t assume the installer will “make it work” without consequences. That usually shows up later as binding, drafts, or trim gaps.
3) Choose the Right Frame Material
The frame material affects maintenance, insulation, appearance, and long-term durability.
Vinyl is often the practical choice
A sliding vinyl window is one of the most common residential choices because it usually offers a strong balance of:
- Low maintenance
- Good energy efficiency
- Corrosion resistance
- Cost control
- Consistent performance in many climates
For many homeowners and builders, vinyl is the “smart standard” rather than the luxury option and that’s often a good thing.
If you’re comparing actual sizes and proportions, products like INSPIRE VINYL SVS 72×36 can help you visualize what a typical horizontal slider looks like in a practical residential format.
You may also be comparing size options such as INSPIRE VINYL SVS 60×48, depending on the wall opening and intended room use.
4) Pay Attention to Glass Package and Energy Performance
A sliding window is only as good as the glass package inside it.
What to compare
- Double-pane vs. triple-pane
- Low-E coatings
- Argon or insulating gas fill
- U-factor
- Solar Heat Gain Coefficient (SHGC)
- Visible transmittance
In plain English:
These ratings help determine:
- How much heat comes in
- How much conditioned air stays in
- How comfortable the room feels near the window
- How much direct sun affects the space
This matters more than many buyers expect especially in bedrooms, west-facing walls, and rooms with long afternoon sun exposure.
5) Think About Ventilation and Daily Use
Not all windows are chosen for the same reason.
Some are chosen for appearance. Others are chosen because people actually open them often.
Before installation, ask:
- Will this window be opened daily?
- Who will be using it?
- Is the opening easy to reach?
- Does the room need cross-ventilation?
- Will furniture block operation?
A slider that looks great but is awkward to use becomes dead glass very quickly.
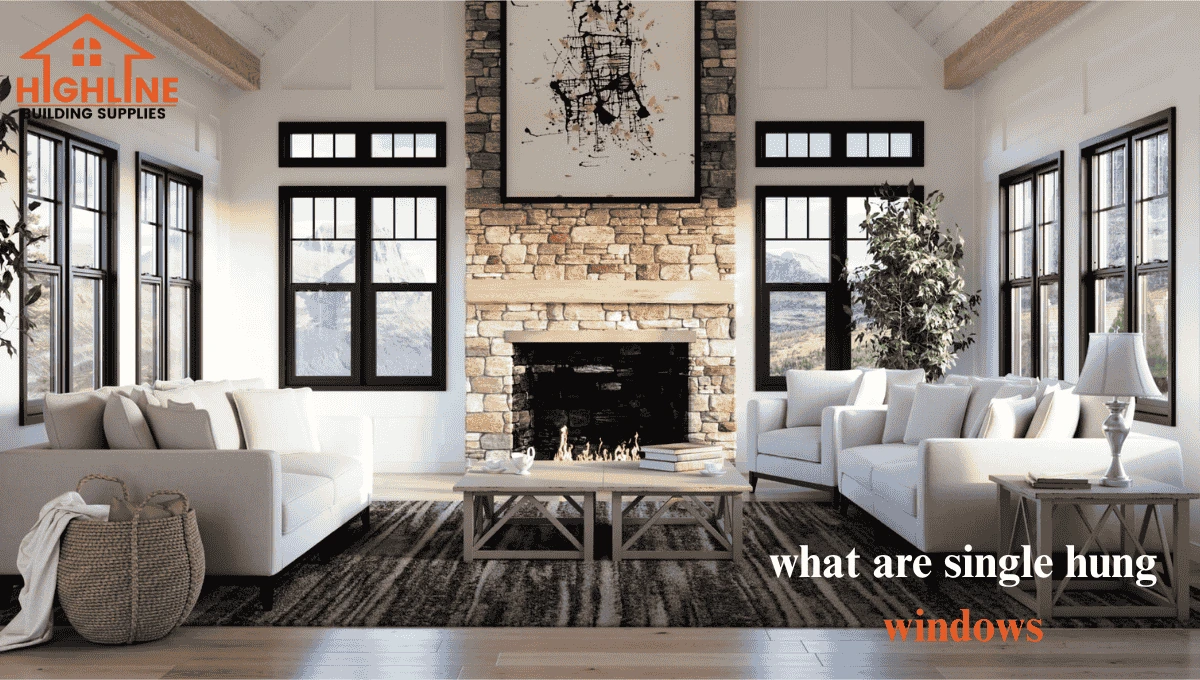
That’s one reason it helps to compare sliders with other common residential styles too. If you’re still deciding, this guide on What Are Single Hung Windows? is useful for understanding when vertical operation may be a better fit.
Can Sliding Windows Be Installed Vertically?
Short answer: Not in the way most people mean.
This is a real question people ask: can sliding windows be installed vertically?
Technically, a horizontal slider is engineered to operate in a specific orientation. Installing it “upright” like a single hung window is generally not recommended unless the manufacturer specifically approves that use.
Why not?
Because the window is designed around:
- Drainage paths
- Roller orientation
- Lock alignment
- Weatherstripping placement
- Structural load expectations
If you need a vertical opening, it’s usually better to choose a window style that was actually designed for vertical operation rather than trying to repurpose a slider.
That’s one of those details that seems minor on paper but creates real problems in the field.
How to Install a Sliding Window: What the Process Usually Involves
If you’re wondering how to install a sliding window, the exact method depends on whether it’s new construction or replacement.
This isn’t a full contractor manual, but here’s the realistic overview.
Typical installation steps
- Remove the old unit (if replacement)
- Inspect the rough opening
- Check for rot, moisture, or framing damage
- Verify measurements
- Prepare the sill and flashing
- Dry-fit the new window
- Level, plumb, and shim correctly
- Fasten per manufacturer specs
- Insulate gaps properly
- Seal and finish interior/exterior trim
- Test operation and locking
- Check drainage and water management
Important:
A window can be “installed” and still be installed poorly.
The biggest difference between a window that lasts 15+ years and one that causes callbacks in year two often comes down to:
- flashing
- leveling
- shimming
- sealing
- drainage
Not just the window itself.
Common Mistakes to Avoid
This is where homeowners and even experienced crews can get tripped up.
1) Ordering based on rough estimates
Close enough is not close enough with windows.
2) Ignoring sill condition
A weak or sloped sill can affect operation and long-term sealing.
3) Focusing only on price
Cheap hardware and weak rollers usually show up later.
4) Choosing the wrong style for the room
A slider is great in the right location—not every location.
5) Over-insulating the frame gap
Too much expanding foam can distort the frame.
6) Poor flashing or water management
This is one of the most expensive mistakes to fix later.
7) Not checking how the sash actually moves after install
If it drags or binds early, don’t assume it will “wear in.”
8) Forgetting maintenance access
Tracks need occasional cleaning to keep performance smooth.
Expert Tips That Make a Big Difference
These are the kinds of practical details that save time, money, and frustration.
Best practices before installation
- Always measure twice, preferably three times
- Check the opening for square before ordering
- Use manufacturer-approved install methods
- Don’t mix generic sealants without checking compatibility
- Think about sun exposure before choosing glass
- Plan around furniture, cabinetry, and reach
- Prioritize operation quality, not just appearance
Best practices after installation
- Clean tracks regularly
- Test locks every season
- Check caulking annually
- Keep weep paths clear
- Don’t force a sticking sash diagnose the cause
A good slider should feel smooth and predictable, not heavy or awkward.
Real-World Examples
Example 1: Kitchen remodel
A homeowner replacing an older crank-out unit above the sink may prefer a sliding window because it’s easier to open without reaching around fixtures.
Example 2: Bedroom replacement
A builder replacing multiple aging windows in a rental or renovation project may choose sliders for consistency, cost control, and easier operation.
Example 3: Wide living room opening
A horizontal slider can be a cleaner, more practical fit than trying to split a wide opening into multiple smaller vertical windows.
These are the kinds of layout-driven decisions that matter more than trend-based design choices.
Should You DIY or Hire a Pro?
This depends on the scope and your skill level.
DIY may be reasonable if:
- It’s a simple replacement
- You’ve done finish carpentry or window work before
- The opening is in good condition
- You understand flashing and waterproofing
Hire a pro if:
- The opening needs repair
- The unit is large or heavy
- Exterior finishes are involved
- You’re changing dimensions
- Water management details are unclear
The cost of correcting a bad install usually outweighs the cost of doing it right the first time.
Quick Checklist Before You Install
Use this as a pre-purchase and pre-install review:
- Confirm new construction vs. replacement
- Verify rough opening measurements
- Choose the right frame material
- Compare energy ratings
- Check room use and ventilation needs
- Confirm orientation and placement
- Review hardware and track quality
- Plan flashing and waterproofing
- Decide DIY vs. professional install
- Inspect operation immediately after install
FAQ:
Are sliding windows easy to install?
They can be, but only if the opening is measured correctly and the frame is installed level, plumb, and properly sealed.
What is the biggest mistake in sliding windows installation?
Poor measuring and poor flashing are two of the most common and expensive mistakes.
Are sliding windows good for bedrooms?
Yes, they can work very well in bedrooms, especially when ventilation, natural light, and easy operation are priorities.
Can a sliding window be used as a replacement window?
Yes. Many homeowners choose sliders for replacement projects, as long as the opening size and layout are a good match.
How long do sliding vinyl windows last?
A quality vinyl slider can last many years when it’s properly installed, maintained, and suited to the environment.
What Homeowners Commonly Say After a Good Install
The biggest difference was how much easier the room felt to air out once the old window was gone.
We almost ordered the wrong size. Taking better measurements upfront saved us from a costly delay.
The new slider looked simple, but the smoother operation and tighter seal made the whole upgrade feel worth it.
Final Thoughts
Sliding windows are one of those products that seem straightforward—until the wrong size, wrong orientation, or wrong install method creates a chain of avoidable problems.
If you’re planning a project, the smartest move is to focus less on what looks good in a product image and more on what will actually work well in your room, wall opening, and daily routine.
A well-chosen sliding window should feel easy to use, efficient, and visually clean—not like a compromise you’ll notice every season.
About the Author
Highline Supplies Editorial Team writes practical home improvement and building material content designed to help homeowners, renovators, and builders make more informed decisions. Our content focuses on real-world usability, product understanding, installation planning, and the details that often matter most once a project moves from browsing to execution.


Leave a comment