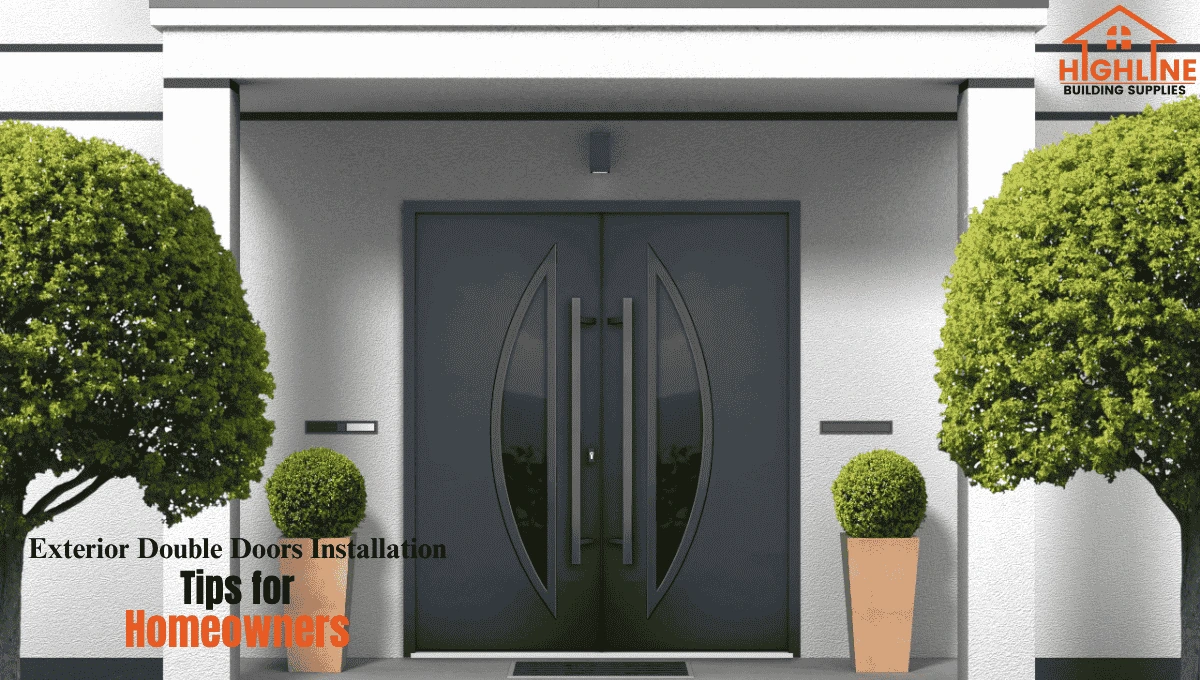
Fiberglass Double Entry Doors: Complete Buyer’s Guide
Choosing the right entry door isn’t just about looks it affects security, energy efficiency, durability, and long-term maintenance. Fiberglass double entry doors have become a go-to option for homeowners and builders who want the elegance of a grand entrance without the upkeep issues of traditional materials. But not all fiberglass doors are equal, and making the wrong choice can lead to costly replacements or performance problems down the line.
This guide breaks down everything you need to know from materials and styles to installation insights and real-world considerations so you can make a confident, informed decision.
What Are Fiberglass Double Entry Doors?
Fiberglass double entry doors consist of two hinged door panels made from reinforced fiberglass, designed to function as a wide, symmetrical entrance. They are commonly used in:
- Main home entrances
- Custom builds and luxury homes
- Renovations aiming to improve curb appeal
Unlike wood or steel, fiberglass doors are engineered with a composite structure that resists warping, cracking, and moisture damage.
How They’re Built
Most fiberglass front entry doors include:
- A solid or foam-filled core for insulation
- Fiberglass skins molded to mimic wood grain or smooth finishes
- Reinforced frames for structural stability
- Optional glass inserts for natural light
This construction gives them a unique balance of durability and design flexibility.
Why Fiberglass Double Doors Are Popular
Homeowners and builders often choose fiberglass double front doors because they solve multiple problems at once especially in climates with humidity, heat, or fluctuating temperatures.
Key Benefits
- Durability Without Warping
Unlike wood, fiberglass won’t swell, crack, or rot due to moisture. - Low Maintenance
No frequent repainting or sealing required—just occasional cleaning. - Energy Efficiency
Insulated cores help maintain indoor temperature, reducing energy costs. - Design Versatility
Available in modern, traditional, and transitional styles. - Strong Security
Reinforced frames and multi-point locking systems enhance safety.
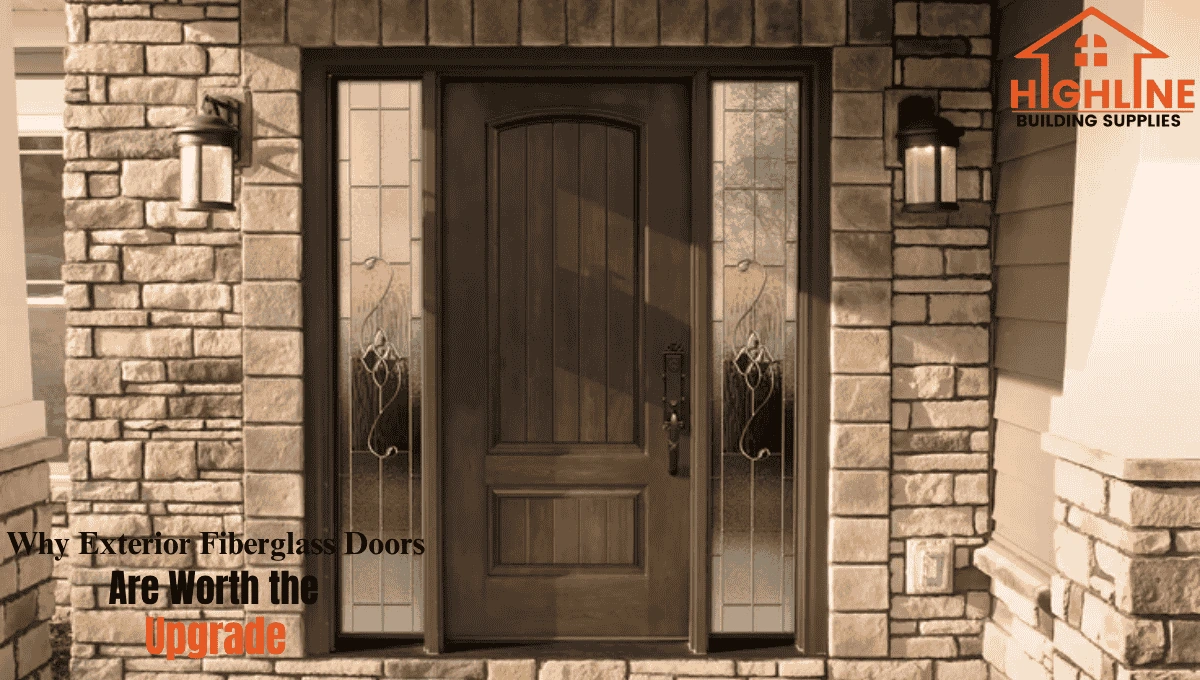
For a deeper look at why homeowners are upgrading, this resource on
exterior fiberglass doors explains long-term performance advantages.
Limitations to Be Aware Of
No material is perfect. Understanding the downsides helps you avoid unrealistic expectations.
Potential Drawbacks
- Higher upfront cost than basic steel doors
- Limited natural feel compared to real wood (though high-end models are close)
- Quality varies by manufacturer—cheaper versions may look less realistic
- Installation precision required for proper sealing and alignment
These aren’t deal-breakers, but they matter when budgeting and planning.
Types of Fiberglass Double Entry Doors
Not all double fiberglass entry doors look or function the same. Your choice depends on your home’s style, light requirements, and privacy needs.
1. Full Glass Double Doors
- Maximum natural light
- Best for modern homes
- May require privacy glass or coverings
Example:
Modern 3/4, 4-Lite French Clearglass Double Door offers a clean, contemporary look with strong visual appeal.
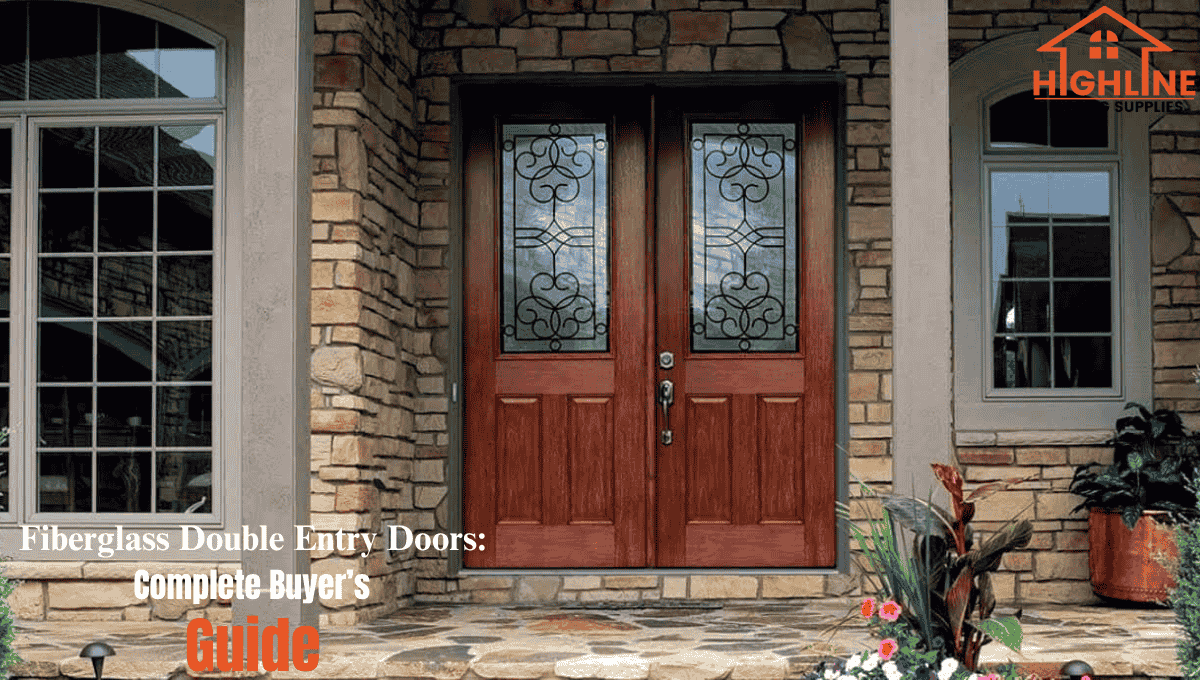
2. Decorative Glass Doors
- Includes etched, frosted, or patterned glass
- Balances privacy and aesthetics
- Works well for upscale entryways
Example:
Wrought Iron Fiberglass Double Door with Decorative Glass adds architectural character while maintaining durability.
3. Solid Panel Doors
- No glass inserts
- Maximum privacy and security
- Ideal for traditional or minimalist homes
4. Partial Glass (Lite) Doors
- Glass panels in upper or middle sections
- Balanced light and privacy
- Common in transitional designs
Fiberglass vs Wood vs Steel: What Actually Matters
When comparing materials, focus on real-world performance not just appearance.
| Feature | Fiberglass | Wood | Steel |
| Durability | High | Medium | High |
| Maintenance | Low | High | Medium |
| Energy Efficiency | Excellent | Moderate | Good |
| Cost | Mid-High | High | Low-Mid |
| Weather Resistance | Excellent | Poor | Moderate |
Practical takeaway:
Fiberglass offers the best balance for most homeowners—especially where climate exposure is a concern.
What to Consider Before Buying
Choosing the best fiberglass entry doors isn’t about picking the nicest design—it’s about matching the door to your home’s needs.
1. Door Size and Opening
Double doors require wider framing. Measure:
- Rough opening width and height
- Clearance space for both panels
- Entryway proportions
2. Insulation and Energy Ratings
Look for:
- Polyurethane core
- Energy Star ratings
- Proper weatherstripping
This directly impacts comfort and utility costs.
3. Glass Type
If your door includes glass:
- Tempered or laminated glass improves safety
- Low-E coatings improve insulation
- Frosted or textured glass adds privacy
4. Frame Quality
Even the best door fails with a poor frame.
- Choose reinforced composite or wood frames
- Ensure proper sealing
- Avoid low-grade materials
5. Hardware and Locking Systems
Double doors require:
- Multi-point locking systems
- Strong hinges
- Secure astragal (center sealing mechanism)
Fiberglass Front Doors Installation: What to Expect
Installation is where many issues begin—not the door itself.
Key Steps
- Remove existing door and frame
- Prepare and level the opening
- Install and secure frame
- Align both door panels precisely
- Seal gaps and install hardware
Why Professional Installation Matters
Improper installation can lead to:
- Air leaks
- Misalignment
- Difficulty opening/closing
- Reduced lifespan
Even high-end fiberglass front doors won’t perform well if installed incorrectly.
Common Mistakes to Avoid
Many homeowners make the same avoidable errors when choosing or installing double entry doors.
- Prioritizing Looks Over Performance
A beautiful door that leaks air or warps quickly becomes a problem.
- Ignoring Climate Conditions
Humidity, heat, and sun exposure all affect door performance.
- Choosing Low-Quality Fiberglass
Not all fiberglass is equal—thin skins and poor cores reduce durability.
- Skipping Professional Installation
DIY installation often leads to long-term issues.
- Overlooking Security Features
Double doors need stronger locking systems than single doors.
Expert Tips from Real-World Experience
These insights come from what consistently works in actual projects:
- Choose textured fiberglass if you want a wood-like finish without maintenance
- Go with pre-finished doors to save time and ensure even coating
- Check hinge placement carefully—alignment matters more on double doors
- Invest in good weatherstripping—small detail, big impact
- Test door swing direction before final installation
Real-World Use Cases
Case 1: Modern Home Upgrade
A homeowner replaced aging wood doors with fiberglass double front doors featuring glass panels. Result:
- Reduced maintenance
- Improved natural lighting
- Better insulation
Case 2: New Construction Project
A builder installed double fiberglass entry doors across multiple units:
- Consistent performance across homes
- Faster installation compared to custom wood
- Fewer post-installation complaints
Case 3: Climate-Exposed Entryway
In a high-humidity region, fiberglass doors replaced warped wooden ones:
- No swelling or sticking issues
- Maintained alignment over time
Exploring Quality Options
If you’re evaluating different styles and configurations, browsing a curated selection of
fiberglass doors can help you understand what’s available in terms of design, finish, and features.
FAQ:
Are fiberglass double entry doors energy efficient?
Yes. Most models include insulated cores and tight seals that reduce heat transfer and improve energy efficiency.
How long do fiberglass double doors last?
With proper installation and minimal maintenance, they can last 20–30 years or more.
Do fiberglass doors look like real wood?
High-quality fiberglass doors can closely mimic wood grain, though cheaper versions may look less realistic.
Are double fiberglass entry doors secure?
Yes, especially when paired with multi-point locking systems and reinforced frames.
Can fiberglass doors handle extreme weather?
They perform very well in heat, humidity, and cold, making them suitable for most climates.
What Homeowners Are Saying
We switched from wood to fiberglass, and the difference in maintenance alone made it worth it.
Our double entry doors still look new after two years, even with direct sun exposure.
Installation mattered more than I expected—once done right, everything worked perfectly.
Final Thoughts
Fiberglass double entry doors are a practical, long-term investment for homeowners and builders who want durability, efficiency, and design flexibility without constant upkeep. The key is not just choosing the right style but understanding construction quality, installation requirements, and real-world performance.
If you approach the decision with the right information, you’ll end up with an entryway that looks great, performs reliably, and holds its value over time.
About the Author
Highline Supplies Editorial Team
The Highline Supplies team brings hands-on experience working with modern exterior doors, building materials, and residential projects. Their content is based on real-world product knowledge, installation insights, and practical considerations that homeowners and builders face every day. The goal is simple: provide clear, honest guidance that helps people make better decisions without the confusion or sales pressure.